Master Schedule
Scheduling Rules
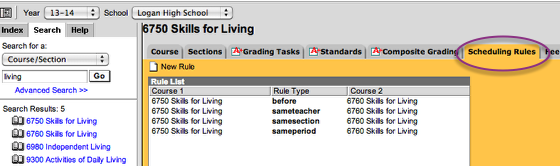
Search: Course/SEction - then Scheduling Rules Tab
Any courses that need to have the same teacher or same period or same section or before/after another class should be set up on this screen. There are many other Rule Types. Use the NEW RULE to add as many rules as you need.
Before means that course1 needs to be taken at any time in the year prior to course 2. Preceeds means that course1 needs to come in the term right before course2 (consecutive terms).
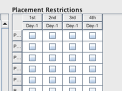
Specific course in a specific time slot
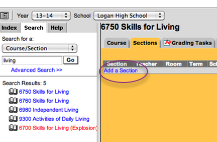
If you have a course that MUST be in a specific time slot (6th grade band, AP Biology) you can add that section specifically on the course screen (Course/Sections) - Make sure that you are in the "next" school year
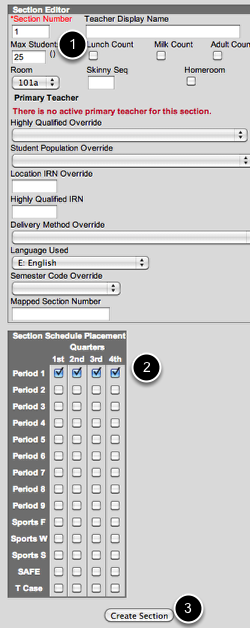
Enter the section number, Max students and room number (if it must be specific). Also, check the terms in which this class MUST fall into. If it is a semester class then only check 1/2 or 3/4. Full year class must have 1-4 checked. Click Create Section. *Teacher Display Name does NOT add a teacher. Teacher must be added under the Staff History Tab
Add a Staff Member to a class

If you need to add a specific teacher to the section above, ADD Primary TEACHER. Use the drop down to add a teacher. SAVE
*If a new teacher is not in the list, contact Leigh Ann Leach to add them to the Census directory and to the school.
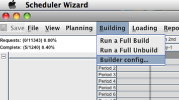
SCHEDULING WIZARD - ONLY 1 USER AT A TIME

Index/Scheduling/Schedule Wizard
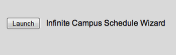
Launch the Wizard
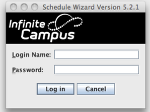
Log in with your IC username and password
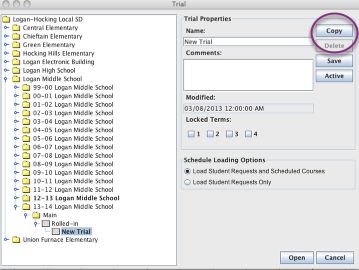
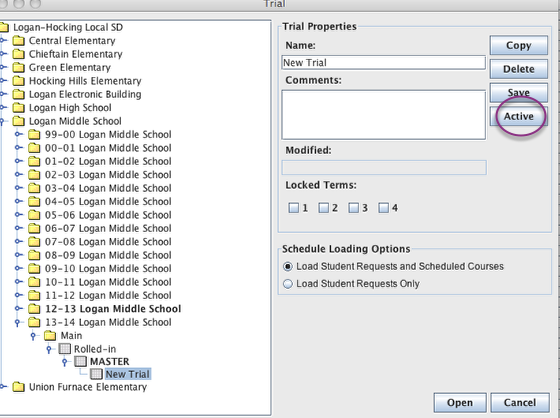
First time: Make a copy of the Rolled-In Schedule
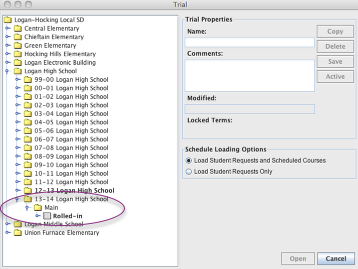
1. Click on Rolled-In, Hit COPY
You now have a NEW TRIAL
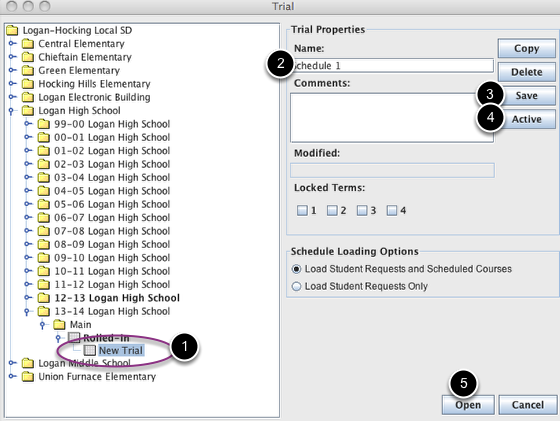
1) Click on New Trial
2) Rename the name of your schedule if you wish
3) Save
4) Make this schedule the ACTIVE schedule
5) Open
This screen is the "White Board"
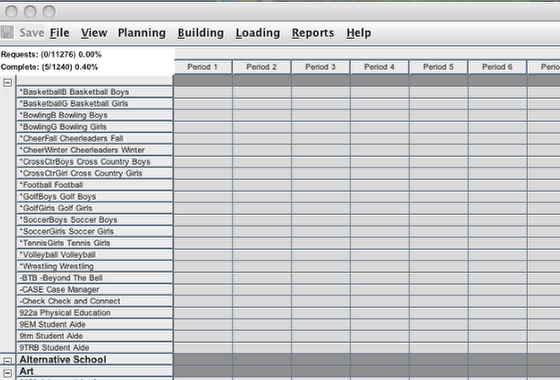
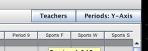
White Board can be viewed in several different views. Use the Teachers/Courses and/or Periods: X-Axis/Y-Axis toggle switch to find the view for you
Do you want to work with Staff or Course? Go to PLANNING and choose Staff Planner or Course Planner
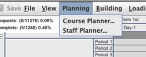
Staff Planner
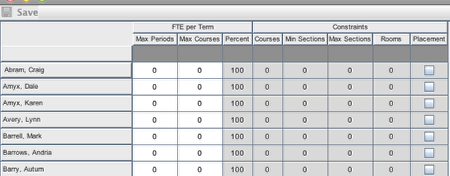
Columns in White can be adjusted. Grey columns are informational only.
Staff Planner - Click an individual teacher to add room assignments or period restrictions
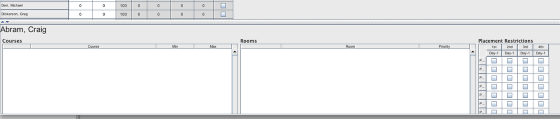
It is recommended to NOT add individual courses to the staff. Only enter rooms or Period Restrictions. To add a room, choose ADD NEW (may need to scroll down on the page to see "add new")
Staff Planner - Add a room(s) that the teacher will be in and put a check in any period or term that this teacher can NOT teach. SAVE

Enter a restriction for the teachers lunch (if it is a specific period) or coaches who are not available for a specific period
Course Planner - go to Planning/Course Planner
Columns in white can be adjusted, Grey columns are informational only.
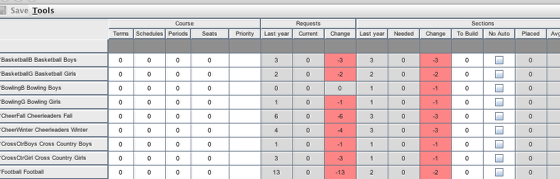
Can add a priority (if applicable) / adjust number of seats.

The lowers the number in the priority column, the higher the priority
# of sections to build
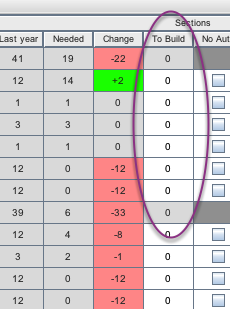
Enter the number of sections to build. The columns to the left of "to build" show you last years sections, the number needed this year, and the change in what you need.
To add or view a rule, teacher, room, or period restriction - Click on a class
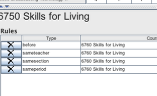
Adjust the rules for the course or you can adjust them on the actual Course/section in IC (outside of scheduler)
Add the teachers that can teach this specific course.
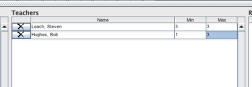
You can enter the Min/Max that the teacher can teach THIS course
Enter a Room ONLY if the course can be in a SPECIFIC ROOM

The room will usually be set up with the teacher under STAFF PLANNER
Enter a restriction if this COURSE can not be offered during a specific period/term
Put a check in the period/term that it is NOT available
**You can also enter this in IC under Course/Section - enter the section that it can be offered and the specific period available
ENTER RESTRICTIONS HERE FOR YOUR LUNCH COURSES
SAVE, SAVE, SAVE before moving on to another course
To close out of the Course/Staff Planner - Click the red box in top left corner. You will return to the White Board
Set up Builder Configuration
Building/Builder Config...
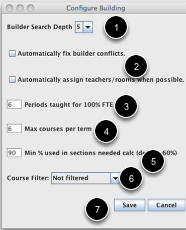
1. The number of times the scheduler needs to work to build the schedule. The higher the number the harder it will work. 5 is a nice number to start
2. Automatic Fix and Automatic Assign - Doug and Kirk recommended not using at this time
3. Period taught for 100% FTE - (the number of period per day that a teacher can teach in a day)
4. Max courses per term (# of courses a teacher can be scheduled into). Take the number of periods in a day and subtract lunch period and/or planning periods.
5. Min % used in section needed to calc (If a section reaches this percent then it will add a new section)
6. course filter - Can change to run singletons...or leave as Not filtered
7. SAVE
ONCE YOU HAVE ALL OF YOUR RESTRICTIONS, SECTIONS, PLACEMENTS ENTERED - MAKE A COPY OF THE SCHEDULE
Make the copy ACTIVE so that you don't mess up your master.
Building/Run a full Build - The creates the courses and sections ONLY

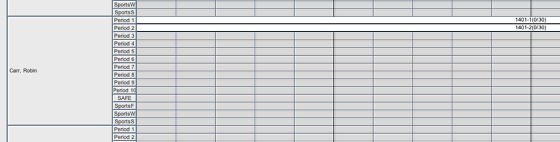
This will create your courses/sections. They will appear on the WhiteBoard. You can move them around on the WhiteBoard.
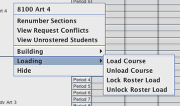
Move the courses around on the white board if you wish. You can LOCK a course
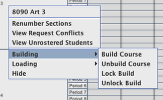
By right clicking on a course you can Build/Unbuild Course or Lock/Unlock a Build.
If you don't like where the sections are placed for a specific course you can Unbuild the course and then rebuild the course (without having to Unbuild/Build the entire schedule)
If you move a course on the whiteboard, it will automatically lock it in the new position. To unclock, use the Unlock Build for that section
Any courses that you hand building in IC - you will NEED to LOCK into place or it will get wiped out by an UNBUILD.
For instance, the 6th grade Language Arts - can be set up in IC under Scheduling/Courses. When you come into the Course Planner, Right click on these courses and LOCK them (Building/Lock Build). This will make sure that you they do NOT get wiped out during an unbuild.
To Unload ALL of the Courses from the scheduler
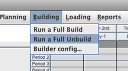
Building/Run a Full Unbuild
YOU WILL BUILD AND UNBUILD YOUR SCHEDULE MANY TIMES BEFORE LOADING THE STUDENTS.
Set up Load Configuration

1. Full load search depth - 5 is recommended
2. Default Course Priority - 1 is recommended
3. Autoload Search Depth - # of times scheduler will try to schedule a request
(Leave both autoload check boxes unchecked)
4. Choose all grade levels or choose an individual grade level that you want to schedule
5. SAVE
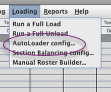
Loading the students- Run a full load - This will add the students to the courses/sections that you created.
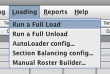
Loading/Run a Full Load.
SAVE, SAVE, SAVE when it is finished.
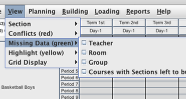
Use the View toolbar to help you show missing data, conflicts, etc.. on your whiteboard.
Once students are loaded, you can load/unload the course full of students or you can LOCK/UNLOCK the students in a section/course
Right click on the course/section that you want to adjust the studetns
To Unload ALL student requests from Schedule Wizard
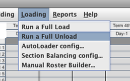
Loading/Run a Full Unload. May or may not want to do this. Sometimes it is easier to unload the students and start over.
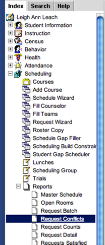
Reports - Report/Master Schedule - best report in the builder. Others are not as useful at this time

Index/Scheduling/Reports/Request Conflicts
Helpful report outside of the schedule wizard.