Ad-Hoc Reporting
Designing/Creating Ad Hoc filters for searching and reports
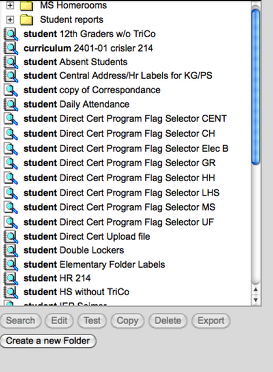
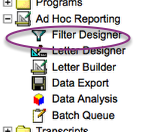
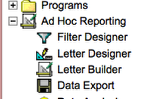
Index / Ad Hoc Reporting / Filter Designer

List of all of your filters that you have created or have been shared with you.
TO CREATE A NEW FILTER
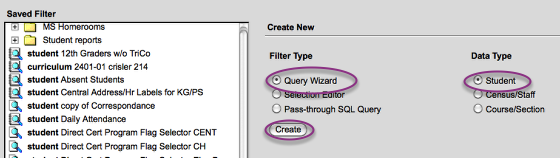
Choose Query Wizard and STUDENT
CREATE
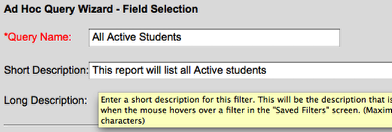
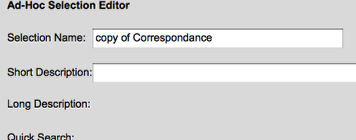
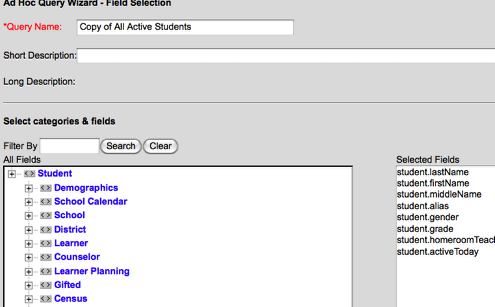
Name the Query. If you would like to also include a Short or long description to further explain, you can.
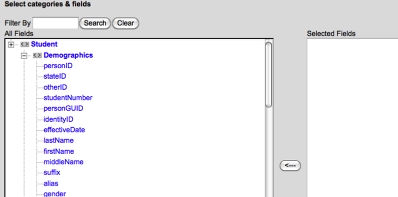
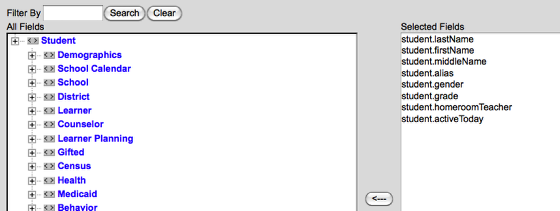
Choose the fields that you would like in your report and/or that you would like to sort or search by. Please include ACTIVE TODAY (which is found under Student/Demographics) The fields that you would like in your report need moved to the "Selected Fields" box on the right side of the screen.
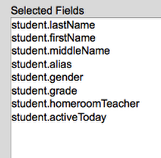
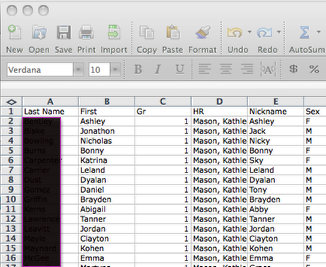
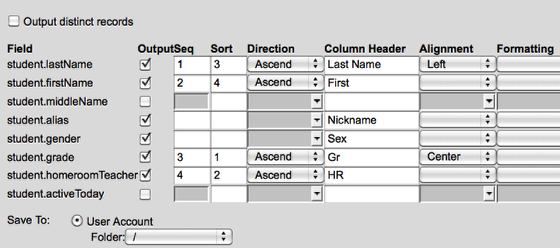
I have chosen lastname, firstname, middle name, alias, gender, grade, homeroom teacher and Active today.
Click NEXT
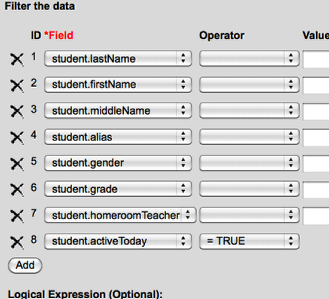
Set up your criteria
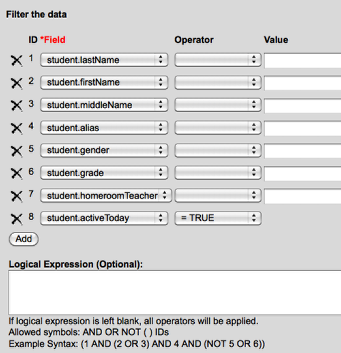
You can see that I have set "student.activeToday" = True. Anytime I run this report it will ONLY pull students that are ACTIVE on that day.

Use the SAVE AND TEST to see if it is giving you the information that you want. If it is blank - then something is wrong in your selection criteria.
When you are HAPPY with your selection - click NEXT
Choose what you want to print on the report, how to sort, column headers
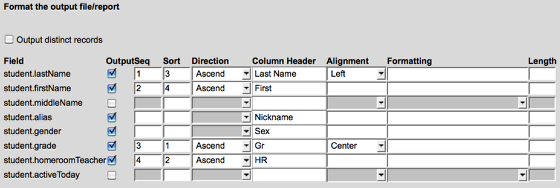
OUTPUT - Do you want the field to print on the report? Check= YES, uncheck=NO.... (You may want it to help determine who shows on the report - but you may NOT want it to print on the report)
SEQ - This is the sequence that it shows on the report from left to right. In this example, it will print lastname in the first column, then first name , then grade then Homeroom teacher - then alias, gender
SORT - Put an order from 1 to 10 - your sort order. In the example above, it will first sort by grade, then homeroom teacher, then student lastname, firstname.
COLUMN HEADER - Enter a Header Name if you want it different than the field name that is listed on the left side of this screen. (Ex: Student.lastname)
ALIGNMENT - You can choose Left/Center/Right
Click SAVE & TEST to see how your report will look.
Click NEXT
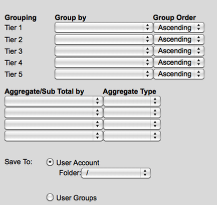
You can use the Groupings to help you get subtotals, etc...Please contact the helpdesk for information about this screen.
TO USE YOUR FILTER
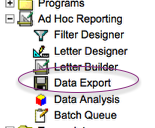
Index/Ad Hoc Reporting / Data Export
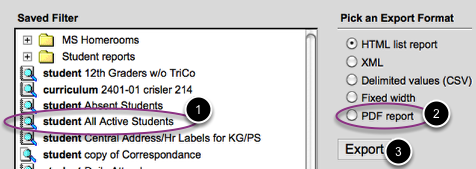
Choose the Ad-Hoc report that you created, Choose the Export Format and then Click Export
If you would like to pull your information into Excel, choose Delimited Values (CSV) - then Export
PDF Report
Excel file
To use your filter for other reports/labels....Go to Census/Reports/Mailing Labels
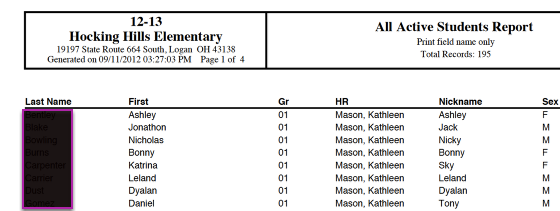
When you generate the report it will ONLY include students in that filter.
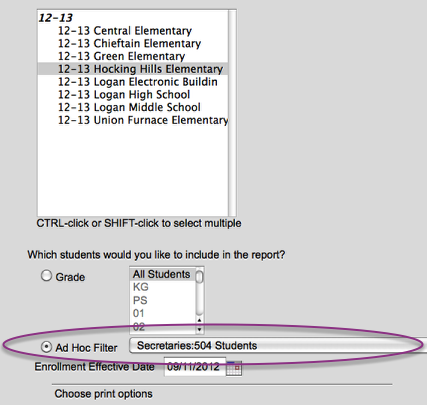
Go to Index/Attendance Wizard.... Choose an Ad-Hoc Filter (ex: Football team, Plan A)
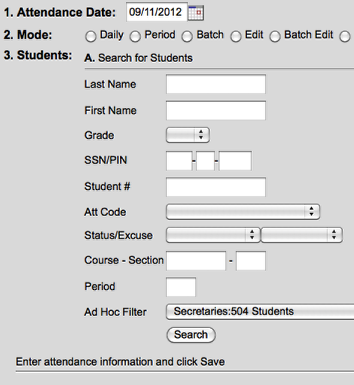
Now you can enter attendance for students in that ad-Hoc. (Football team is leaving 9th period, band kids are out for the week, all girls are absent for the day)
Creating an Ad-Hoc Filter for RANDOM students
Go to Index / Ad Hoc Reporting / Filter Designer
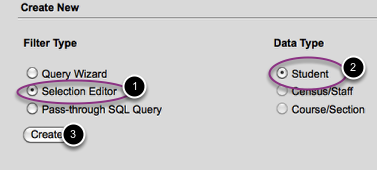
Choose Selection Editor, Student and then CREATE
Search for your students
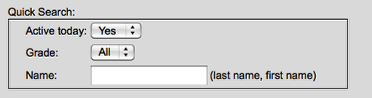
You can search for ALL students or you can narrow your search by grade or name
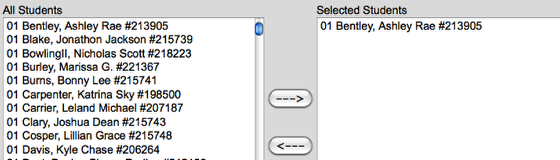
Find students in the box on the left and move them to the right. Because this is only a selection editor - it will not ask you how you want to sort, column headers, etc.... (like Filter Designer/query)
SAVE

Now, you can use this export just like your other filters...Labels/Attendance, letters, etc...
To EDIT OR CHANGE A FILTER
Go to Index / Ad Hoc Reporting / Filter Designer
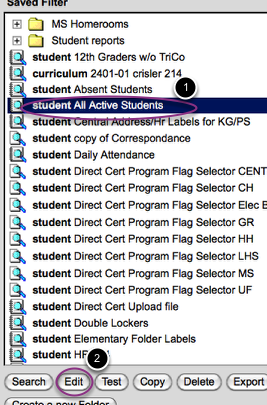
Choose the filter
Click EDIT
(IF this filter is contained in a shared folder (indicated by an icon with 2 heads) such as SECRETARY, ATTENDANCE CLERKS, etc... do not edit as these are shared amongst many people). Instead, make a copy and then edit your copy. (See instructions for copying filters)
You can add fields or subtract fields on this screen... Click Next
You can change your criteria...
Or you can change your output. Just make sure that you SAVE after making changes
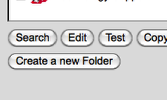
TO MAKE A COPY OF A FILTER
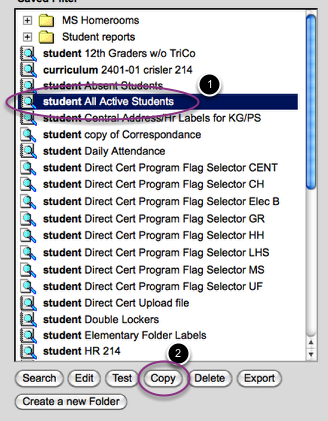
Select a filter that you would like to copy.
Click COPY
You can copy filters that are shared in the shared folders (indicated by the icon with 2 heads) - when you copy, the copy will appear in YOUR list - not the shared list.
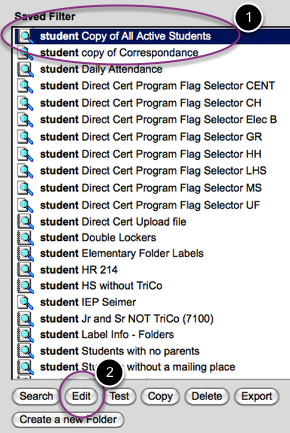
A copy of the filter now appears in your list. Select it and click EDIT
Rename the Query name so that it no longer is called "Copy of"...Make this query name unique. SAVE You can change any of the fields involved, sorting options, selection criteria.
ORGANIZING YOUR FILES
You can use the CREATE a NEW FOLDER to create folders within your Filter list. Example: Beginning of the year - to contain all of your beginning of the year filters. Attendance - for all reports about attendance.