Setup assignment types, seating charts and grading methods
This section will cover accessing student information, setting up seating charts, setting up assignment types, setting calculation methods and setting the grading scale
11 - Accessing Student Demographic Information

To access student information, either click on a class link, then click on a student's name; or click on the Student Information link, then choose a student from the popup menu.
12 - Demographic Info Available

Most of the Demographic information available from eSIS is synced with and available in ProgressBook
13 - Creating Seating Charts
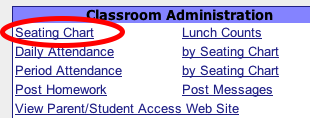
To begin creating seating charts for your class, choose a class by clicking its name. Next click the Seating Chart link under the Classroom Administration section
14 - Seating Chart Settings
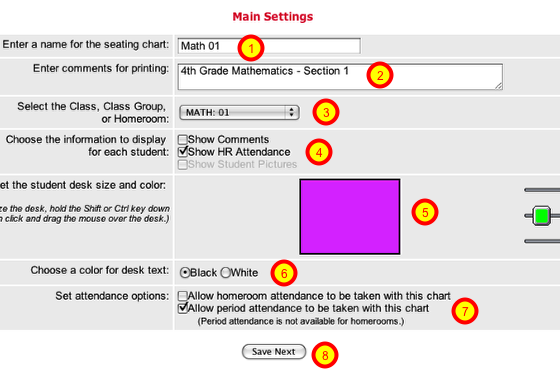
1 - Name the seating chart
2 - Enter comment for printing
3 - Choose the class or group for this chart
4 - Set display options (Choosing Show HR Attendance allows a teacher to see what students were marked absent in the morning)
5 - Use sliders to set the desk color
6 - Choose the font color (Black for lighter desk and White for darker desk)
7 - Set attendance options (Choose period attendance)
8 - Click Save Next link
15 - Seating Chart Cleanup
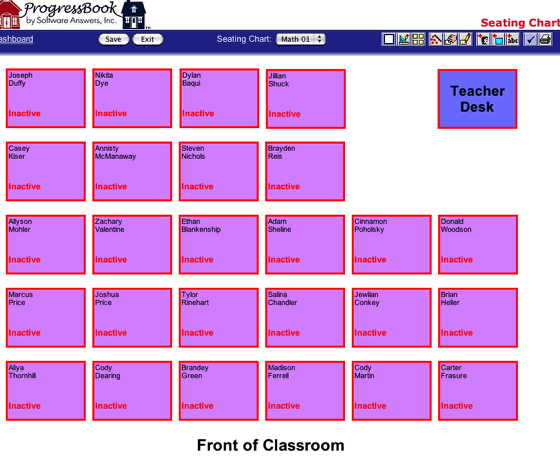
Tools in the upper left corner allow you to edit your seating chart, add objects, notes, rearrange seats, and print a hard copy for subs
16 - Setup Average Calculations
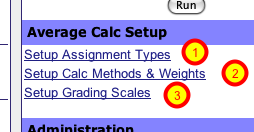
The next three sections will cover
1 - Setting up Assignment Types
2 - Setting up Calculation Methods
3 - Setting the Grading Scale
These links are on the Grade Book page in the Average Calc Setup section
17 - Setting Assignment Types
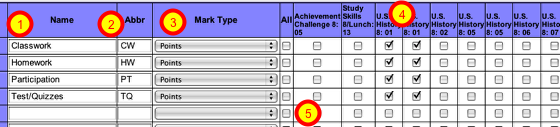
On this page, you need to:
1 - Enter all the assignment types in all your classes
2 - Give the assignment type a 4 or less character abbreviation
3 - Set the Mark Type (Should be POINTS)
4 - Choose the Classes that will be using that assignment type (note the All column checkboxes, which selects all classes after clicking the Save button)
5 - Click the Save button at the bottom, then click the Grade Book link at the top right
18 - Setting up Calculation Methods
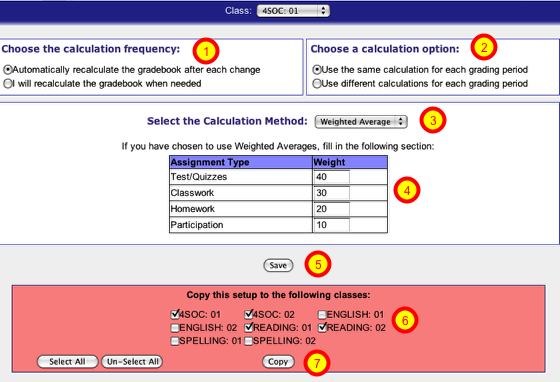
On this page, you need to:
1 - Choose the calculation frequency - Automatic
2 - Choose the calculation option - Same for each grading period for most
3 - Select the Calculation Method - Weighted Average for most
4 - Click the Save button
5 - Choose which classes to copy this setup to
6 - Click the Copy button
Repeat if necessary for classes with different weights or assignment types, then click the Grade Book link at the top right
19 - Setting the Grading Scale
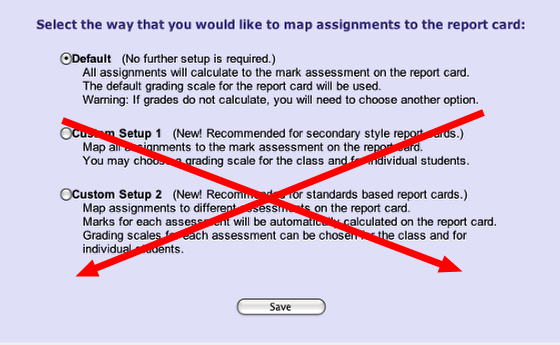
This is an easy one. Since we are printing report cards through eSIS and not through ProgressBook, make sure the choice on the Setup Grading Scales remains the Default setting.