iPhoto - Basic Guide
This basic guide covers the following topics:
1. Taking photos
2. Importing photos into iPhoto
3. Editing
4. Sharing with Others via email
Taking Photos
Importing photos into iPhoto - Import
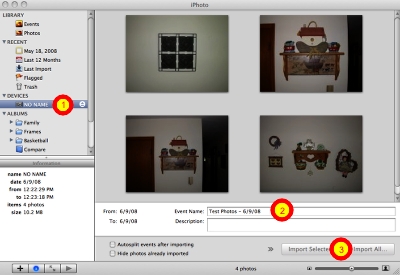
Directly connect your camera to the computer or use a card reader to import photos into iPhoto.
1. Either the camera or card will show under Devices as No Name
2. Enter an event name and date for your photos for organizing & finding later
3. Choose to import all
Importing photos into iPhoto - Delete Originals
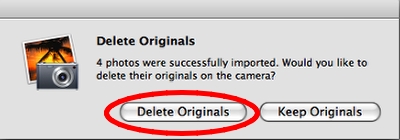
Choose to Delete Originals to keep your storage card clear for the next time you take pictures
Importing photos into iPhoto - Create an Album
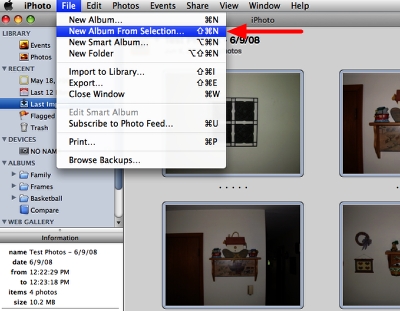
• After importing, select all photos from the Last Imported by going to Edit -> Select All (Command-A).
• Then go the File -> New Album From Selection...
• Give the Album a Name, then choose Create
Importing photos into iPhoto - Eject the Card or Camera
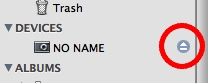
Click the Eject icon beside the No Name Device to dismount the storage card or camera before removing the card from the reader or disconnecting the camera from the computer.
Editing
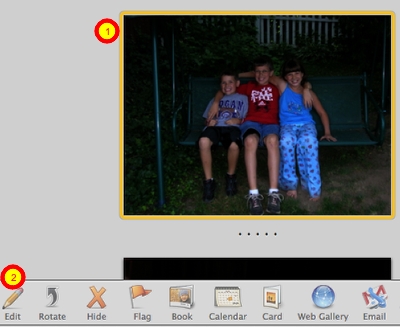
1. Click once on a photo to select it, use command-A to select all photos for editing
2. Click the Edit icon in the toolbar at the bottom of the iPhoto window
Editing - Cropping
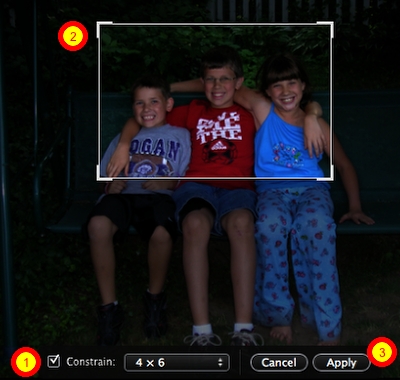
1. Choose a Constrain option (usually 4 x 6 for prints)
2. Use the corners of the crop window to make adjustments
3. Click Apply
Editing - Adjusting the levels
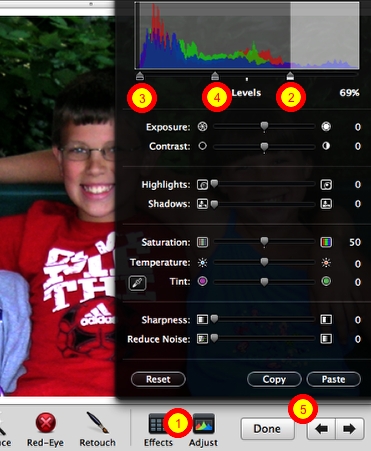
1. Click the Adjust icon to adjust the photo's levels
2. Drag the right marker to the left to remove the darkness
3. Drag the left marker to the right to remove the brightness
4. Drag the middle marker level the brightness between the previous two settings
5. Use the arrows to adjust other photos or click Done when you are finished
Editing - Compare
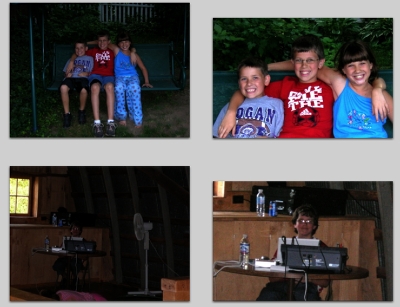
Adjusting the crop and brightness levels can make a nice photo great, or recover an unusable photo.
Sharing with Others - Email (Part 1)
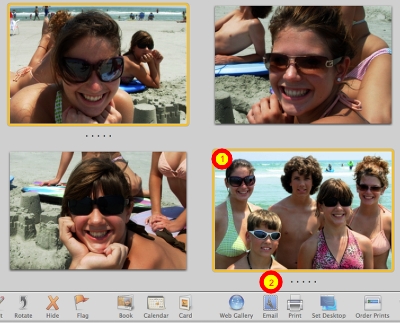
1. Select one or more photos, shown by the highlight frame
2. Click the Email icon in the toolbar at the bottom of the iPhoto window
• To choose all photos in an album, go to the Edit menu, then choose Select All
• To pick and choose selected images, hold down the Command (Apple) key when choosing
Sharing with Others - Email (Part 2)
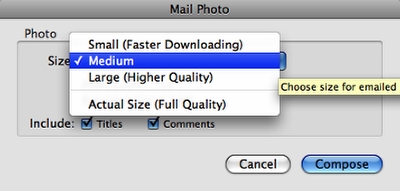
After click the Email icon in the previous step, iPhoto will ask you to choose the size for the emailed images. The eleven images I chose total 12.2 MB in Full Quality, but Full Quality would only be needed for creating 8.5x11 prints. Since I just want others to see the photos on the screen, medium quality will be just fine and the images will be reduced to a total size of 1.3 MB.
Sharing with Others - Email (Part 2)
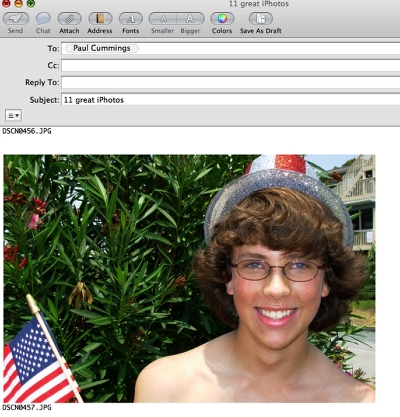
Clicking the Compose button in the previous step will start a new email message for you with the selected images already attached.